
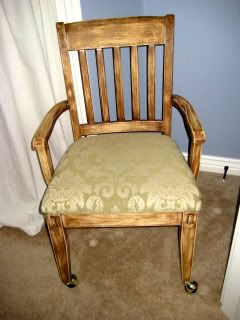
I found this chair a few months back at DI. I thought $8 sounded like a steal, so I bought it. I went to my local fabric store, bought some elegant, light green, damask upholstery fabric for the seat, and planned on painting the wood. I got halfway through sanding and decided I liked it just like that. I painted two coats of clear polyurathane, replaced a couple of the castors, and voila! A brand new office chair for under $40! I searched and searched for my before picture. I know I took one. If I find it I'll post it later.
This video has a pretty good demonstration but I definitely suggest reading up on a few projects before jumping in. Have a plan before you start. If this is your first reupholstery experience, I would also suggest starting with a smaller project like I did.
For MY chair, I unscrewed the seat and removed the former fabric, which was old and stained, but kept it and used it as a pattern. I pinned it to my new fabric- making sure to center the damask pattern- and cut about six inches extra all the way around the old fabric to get a fresh seat cover.
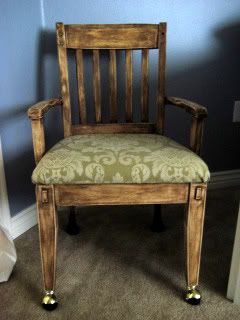
I reused the cushion from the original seat because it was still in good condition, but I didn't use any glue. I had to use a heavier duty staple gun, borrowed from a friend, because Hubba's just didn't do the job.
Also, after stapling my fabric, I trimmed it about an inch from the staples, for a cleaner look. Then I stapled some white interfacing to the bottom of the seat and screwed it back in place.
It is the perfect addition to my office and I'm kind of addicted. I'm trying to come up with an excuse to do another chair. Too bad we already have dining room chairs. Maybe I could do some for the bar area. Or the boys room!


No comments:
Post a Comment