
I started a monthly craft night with a group of friends and did a little searching for some projects. In the process, I found these cute fabric pom poms at Once Wed.

I love how they turned out, but it took me awhile to get the process down so I thought I'd do my own tutorial.
Gather your supplies:
- paper lantern (I got three in a box in the wedding section at Wal-Mart, for $10)
- fabric (I got 2 yards. I'm sure you could get by with 1 3/4yd)
- pencil
- fabric scissors
- glue gun
- glue sticks
- hard surface for tracing (I used a quilting mat)
- circle for tracing (I used masking tape)

Fold your fabric a few times and trace your circle onto your fabric.

Cut all of your circles out.
You definitely want to fold your fabric as many times as you can while still being able to cut through it easily with your scissors. You don't want to have to cut out 200 circles by hand!

I was able to fit 26 circles onto my fabric and there were 8 layers, so I only had to cut 26 circles to get 208 in all.

Now you want to make your petals

Fold a circle in half

glue a dot (or a line perpendicular to the crease) in the center of the crease


and fold again


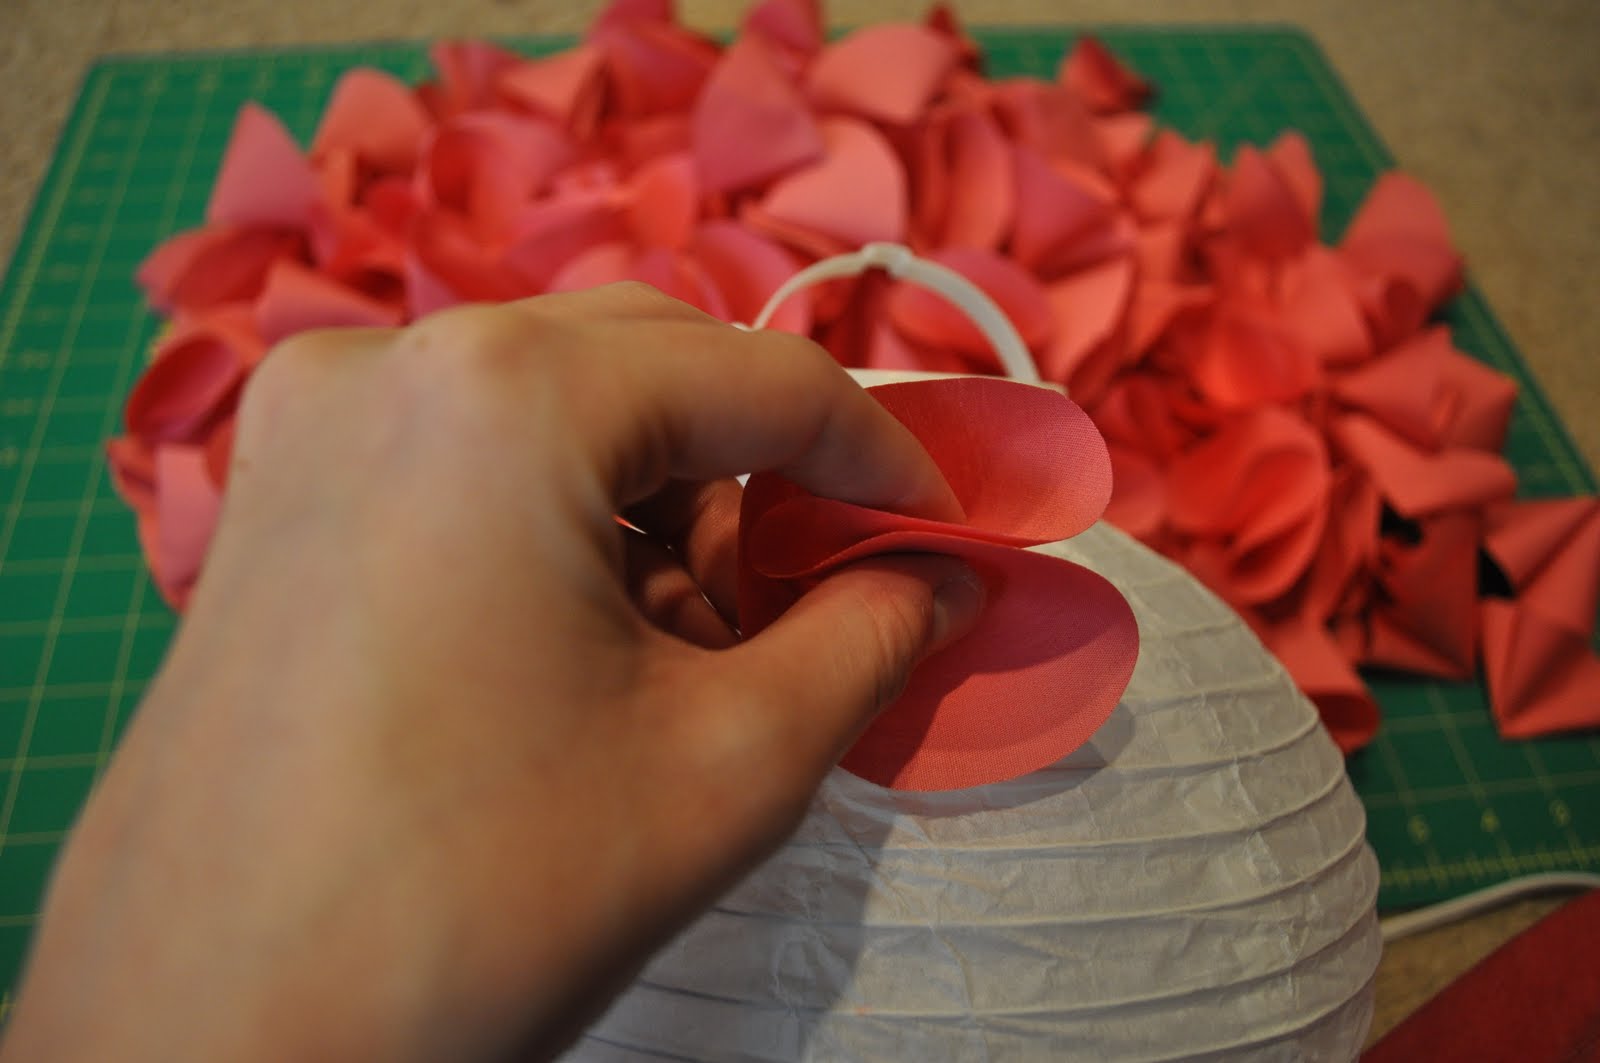

and place the point onto the uppermost part of the paper. Push down and hold for a few seconds, right at the base of your petal.

Keep attaching the petals around the top.


and continue on until you've gone about halfway down the lantern.

Turn it over and start at the top again.


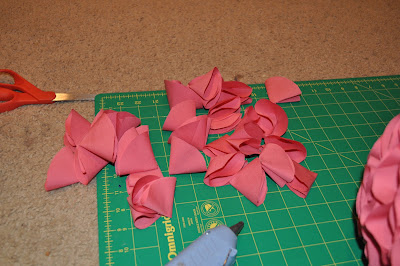
After filling the whole ball, I had some leftover petals. I used them to fill in any empty spaces.
note: I didn't use ALL of my circles. I had a pretty big stack that went unused (I'd say at least 4 of my stacks of 8). As long as you space your petals out pretty well, it's okay if every little bit of the lantern isn't covered.
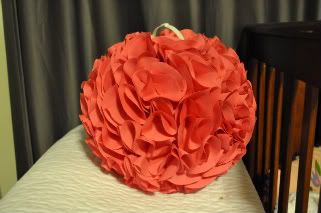
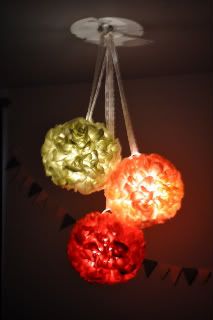
so this is the end product(sorry for the changing colors. I worked on this throughout the day, so it was nighttime by the time I took pictures of the finished pom pom):
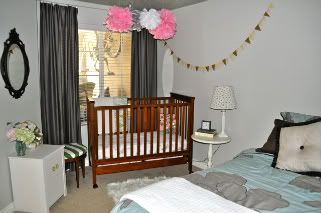
I replaced the tissue pom poms above the baby's crib, with this more durable fabric version.
Before:
After:

Since they light up, they work double duty as a night light!


I'm in love! Thank you so much for sharing this. Love your work. :)
ReplyDeleteWow - those are so beautiful! Sure with I were as ambitious as you are! Love you!
ReplyDeleteLOVE these!!! I really want to make some for my kiddos room.
ReplyDeleteso so cute. I really love this project. Are the lanterns battery operated or do they plug in? They really look cute above the crib.
ReplyDeleteMan, this looks awesome! Now I'm dying to try it.
ReplyDeleteCarrie,
ReplyDeleteTHANK YOU for posting this step by step!!!
I've had these 20 lanterns sitting in my closet since last year (got them all for $4 at Target on clearance) wondering what to do with them. Then I saw these on here... thank you! I only made 3 since they took me a long time and I needed them fast for a shower, but when I get time I might make more colored ones for the toy room. I love how they look lit up over Nell's crib! thanks talented sister!
These are beautiful! Could you tell me what kind of fabric you used?
ReplyDelete