Showing posts with label project. Show all posts

1.7.11

Linky Love and the finished high chair

I contribute to a little blog called 'Save the Date for Us'. It's a place for a few friends to record our dates with our husbands. The goal is to go on one date, every week, for a year. I absolutely LOVE being a part of this project and I'm so thankful to have been invited! Although I'm behind the other girls (because I started a couple months in), the Mr. and I have gone on so many fun dates! Before joining in, date nights were a thing of the past for us. It just wasn't a priority. Now, we make time for it and we have a lot of fun thinking of what we're going to do each week, even if it's just a quick date in the living room, after the kids go to bed. DATE NIGHT has taken on a whole new meaning.

Last week, for our date, we picked out some paint for the high chair that I mentioned in my last post. We found this high chair at the antique store, for $25. We sanded it down a bit, applied a coat of primer and two coats of paint (Royal, 'Waffle Cone').

BEFORE


AFTER


AH!! So fresh. I'm loving this and can't wait to see my little Sweet P in it. I just finished this today and she's taking a nap, but we'll be using it by dinnertime!!


For my next project, I'd love to make a little seat cover for this. I know it's kind of a random project, but if anyone has seen a tutorial out there that could help, just point me in the right direction!

26.6.11

A little fun with furniture

We made a stop at the antique store and found SO MANY things that we LOVED, but we settled for this desk (and a cute little high chair. Pictures of that, later).

Photobucket

Photobucket

We made it out of there for under $60!! Talk about GOOD prices! The desk was only $25!!
It's from The Peabody-Stiggleman Co., so I imagine it must have been sitting in a schoolhouse over 100 years ago. Pretty cool!

Photobucket

We didn't need to make a big change. We really just wanted to see the natural wood, so we sanded it down and then put a couple coats of varnish on. Now it's nice and shiny. Beautiful. I'm so happy to be rid of that paint!

Photobucket

I love all of the little marks and imperfections. There were a lot of spots that wouldn't sand down very well, so there's still some of that green paint in spots, but I wasn't trying to make it look brand new. I couldn't be happier with the outcome.

Photobucket


Photobucket


Photobucket

Photobucket

Now my Colsie has a place to do his schoolwork, other than the couch, where he used to end all of his lessons in the supine position.

Photobucket

10.2.11

Painted glass

I posted this idea for Valentine's Day, but decided I'd like to create something I'd use more often, so I went to Michael's for some 'Vitrea 160' (a water-based, transparent paint for glass) in turquoise and amaranthine (#s 11 and 7, respectively).

You want 160 because it remains transparent after baking. I also bought some paint thinner.


Then I stopped by the thrift store for some candlesticks and mason jars.


I poured a tiny amount of paint, along with about two drops of thinner, in a small tupperware bowl, stirred it around, and painted it on carefully with a paintbrush (with some assistance from my 'helper').


Then I baked it in the oven for the specified amount of time. I think it was 250 degrees for 25 minutes or something close to.

I haven't yet decided what to do with the candlesticks, although I LOVE how they turned out.


But my mason jars are being used to add some life to my previously colorless kitchen. The different shades were achieved by using different paint thickness. I used the least amount of thinner for the darkest one, more thinner for the one on the left, and the one on the right was created when I painted the Vitrea 160 on and then wiped it off with a paper towel. The words are now highlighted with blue but the majority of the jar is clear.


2.2.11

Once Wed: Fabric Pom Pom Tutorial

I started a monthly craft night with a group of friends and did a little searching for some projects. In the process, I found these cute fabric pom poms at Once Wed.

hanging-pom-pom2

I love how they turned out, but it took me awhile to get the process down so I thought I'd do my own tutorial.

Gather your supplies:
  • paper lantern (I got three in a box in the wedding section at Wal-Mart, for $10)
  • fabric (I got 2 yards. I'm sure you could get by with 1 3/4yd)
  • pencil
  • fabric scissors
  • glue gun
  • glue sticks
  • hard surface for tracing (I used a quilting mat)
  • circle for tracing (I used masking tape)


Fold your fabric a few times and trace your circle onto your fabric.


Cut all of your circles out.

You definitely want to fold your fabric as many times as you can while still being able to cut through it easily with your scissors. You don't want to have to cut out 200 circles by hand!

I was able to fit 26 circles onto my fabric and there were 8 layers, so I only had to cut 26 circles to get 208 in all.


Now you want to make your petals

Fold a circle in half


glue a dot (or a line perpendicular to the crease) in the center of the crease


and fold again

Tip: I leave the glue gun at the crease and fold over the gun. Just makes it easier.

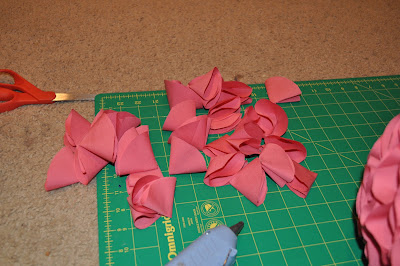
You have your first petal

Make the rest of your petals.

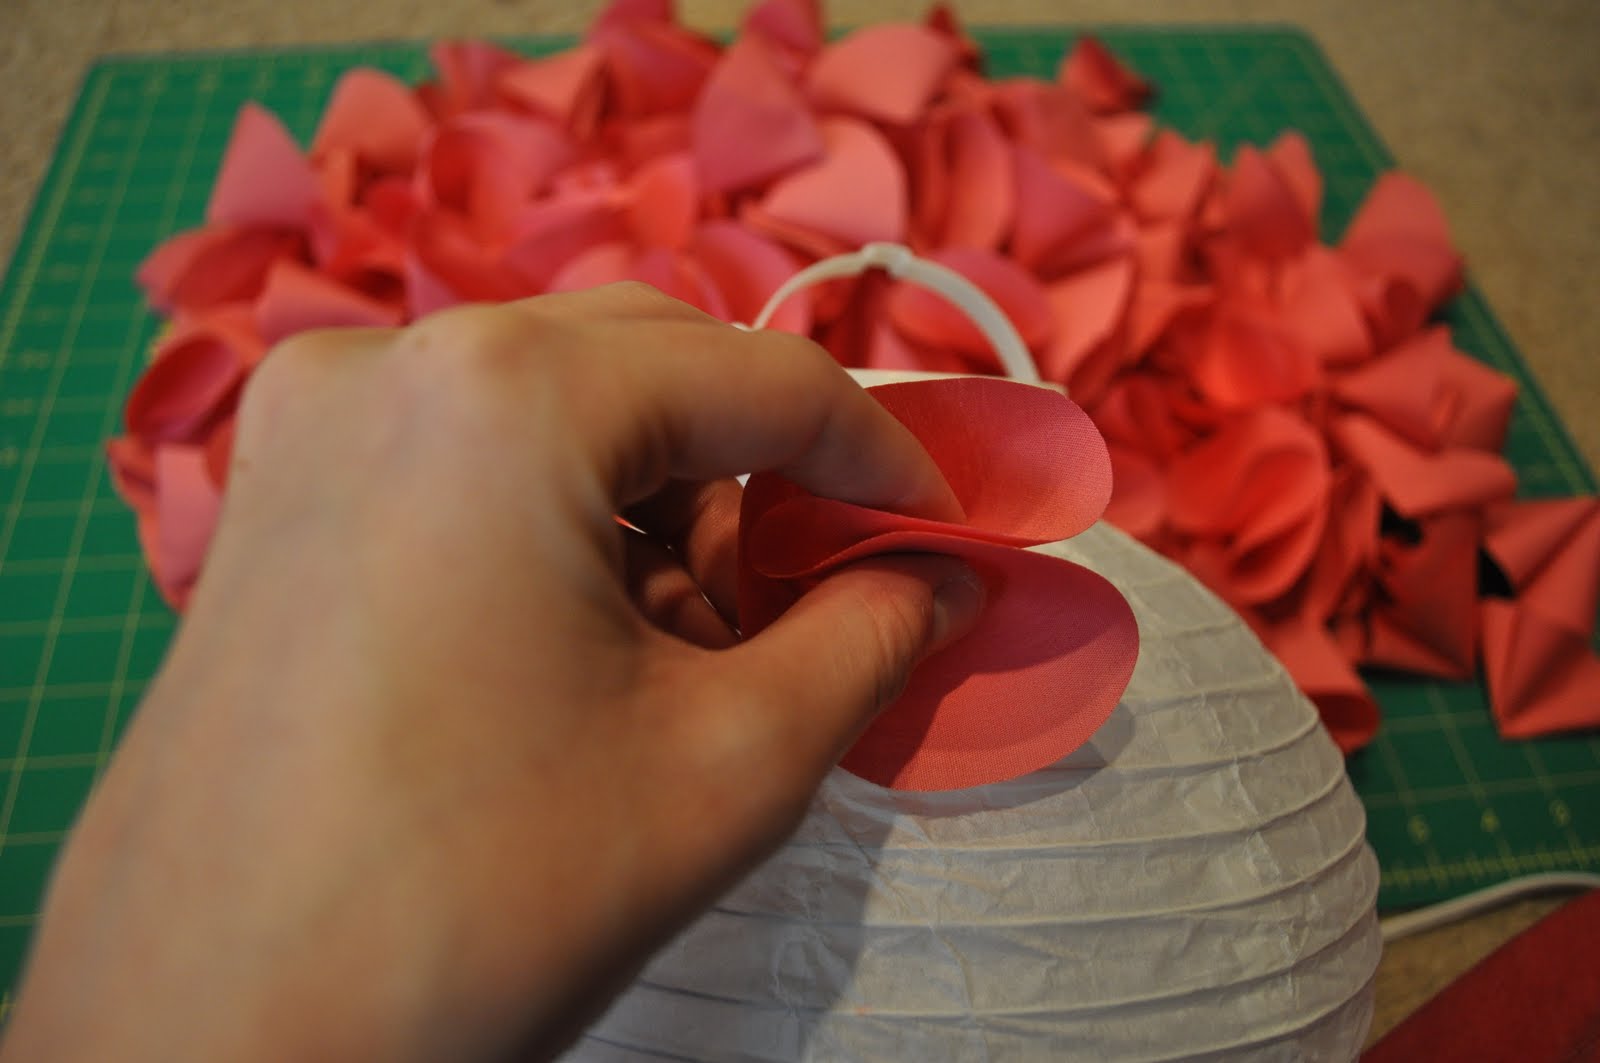
Grab your petal in the center, like this

Put some glue on the tip,

and place the point onto the uppermost part of the paper. Push down and hold for a few seconds, right at the base of your petal.


Keep attaching the petals around the top.


and continue on until you've gone about halfway down the lantern.

Turn it over and start at the top again.

Then keep filling it in until the top and bottom meet in the middle.

After filling the whole ball, I had some leftover petals. I used them to fill in any empty spaces.
note: I didn't use ALL of my circles. I had a pretty big stack that went unused (I'd say at least 4 of my stacks of 8). As long as you space your petals out pretty well, it's okay if every little bit of the lantern isn't covered.


so this is the end product(sorry for the changing colors. I worked on this throughout the day, so it was nighttime by the time I took pictures of the finished pom pom):

Photobucket

I replaced the tissue pom poms above the baby's crib, with this more durable fabric version.

Before:
Photobucket

After:

Photobucket

Since they light up, they work double duty as a night light!

Photobucket

28.1.11

Before and After: Gold frame

I found this gold mirror at DI a couple years ago and never did much with it.

I finally decided it was about time for it to have a purpose in our house, so we painted the frame yellow and we painted the mirror with chalkboard paint.

Photobucket


and hung it in our kitchen. Perfect solution. Now we have a place to write notes to each other, to do lists, recipes, etc.