Showing posts with label tutorial. Show all posts

11.4.12

I am a bow girl. 

My little one, now 6 months old, is starting to grow some hair!  I am excited to actually be able to clip hair things directly in her hair instead of on a headband!


I made several of these bows when she was teeny.  I love them because they have "no slip grip" to keep them from sliding out of baby fine hair.  I even use them to hold back my three year old's bangs (that she cut herself) when her hair is pulled back in a pony tail.

Here is the tutorial I followed (makeit-loveit).  I found it on pinterest:

First of all, everyone has their own technique.  And there are probably a variety of no-slip grip solutions out there.  This is just what I did and what I used.  All worked really well for me. 

When I was first trying to make a bow that would stay in baby fine hair, I remember seeing bows online that had a no-slip grippy on it.  Some of it looked like velvet, other stuff looked sticky.  Some people used velcro and others used magnet material.  We didn’t have a lot of money and so I was trying to figure out a cheap solution.  I remember walking around Wal-Mart one day, trying to decide what I could use to re-create that no slip grip, and I walked by rows of this shelf liner stuff and had an “ah-ha” moment.  This liner material keeps things from slipping in cupboards and on shelves…….why not baby hair.  So I started using it on my hair clips, and it worked like a charm.

And just when you think you have the best idea ever……..you realize other people have it too.  Ha!  Because I have seen other people use this stuff to make their own bows since I thought it up for myself that one day.  How funny!  I swear, we should all participate in a huge think-tank and share all sorts of tricks and secrets.  It would save us all a lot of grief.


Anyway, to make these hair bows (without actually tying a bow), I used 3/8 inch ribbon.  (Grosgrain works best in my opinion.)  I cut 3 pieces that are 4 inches long.  I also use a double prong hair clip that I always buy at Sally Beauty Supply….and they’re about 1 3/4 inches long.  (I found similar ones online here, in case you don’t have a Sally’s.)  Then I cut a piece of the shelf liner that is the same size as the prong section……so about 1 and a  1/4 inch by 1/3 of an inch.  And a piece of felt that is about the same size.


To begin, grab your roll of ribbon and heat seal the end (I use a lighter).

Then hot glue about a 1/2 inch of the end of the ribbon to the very bottom of the clip with the right side of the ribbon facing out (if you have a right and wrong side).

Then add a strip of hot glue to the next section of ribbon…

…..and then fold it around the contours of the pinch part of the clip.  (Don’t worry, the clip will still pinch and the glue won’t affect the spring at all.)

Then measure how much more ribbon you’ll need by stretching it to the tip of the clip, then fold it back up the length of the prongs.  Cut the ribbon off.

Heat seal this end of the ribbon now too.

Now add a long strip of hot glue down the back side of the rest of the ribbon.  Then lay it flat across the top of the top prong, then fold it under towards the bottom of that top prong…..to completely conceal that top prong.  Press the ribbon together to seal the glue together, and keep the ribbon in place.

Now, grab your 3 pieces of 4 inch long ribbon.  Tie a single knot in the center of one of the pieces of ribbon.   Try to make it a neat little knot and keep the two ends flat and laying in the same direction.  Heat seal the ends of the 2 un-tied pieces.

Then grab one of the plain pieces and bend it into a circle.  Overlap the ends by about a 1/3 of an inch and then hot glue them together (image on left).  Then pinch the circle right in the center, creating half of your bow shape, and add a little dot of hot glue to the inside center to keep it pinched together (image on right).

Do the same thing with the other piece of ribbon.  Then cross the two pieces together……not into an actual “X”, more like a squashed one.  Add a dot of glue between the two, to keep them together.

Then place the piece of ribbon with the knot in the middle, right in the center of the squashed “X” (image on the left).  Place a dot of hot glue right under the knot, so it doesn’t move around.  Turn the bow over and cut off the long ends just a bit and glue them down on the back side (image on the right).

Now, glue the piece of shelf liner to the piece of felt.  Press the two layers together. 
CAUTION: this can get hot.  Test it with your fingers and wait until the glue has cooled from hot to warm and then squish the 2 layers together.  Glue will most likely ooze out.  Just peel it off your fingers and continue on!!
Trim off the excess along  each edge, making a nice clean line around all sides.

Then hot glue the felt side to the top prong.


Then glue the bow to the very top of the clip…..right to the ribbon.


Why I do the bows this way:
  • I make the bows in parts so that the bow looks very clean and even.  You can always tie some ribbon into a bow and then glue it onto a clip……but it’s hard to get a nice even bow that way.  It’s totally just preference though.
  • I don’t wrap ribbon around the bottom prong because it’s hard to slide it through hair (like for older girls pony tails and such) if there is ribbon on the bottom.  If you leave it bare, it can slide into hair much easier.
  • I don’t put the shelf liner on both sides  of the prongs because of the reason mentioned above…..I want to keep the bottom prong bare.


And that’s it. 


Also . . . A friend of mine told me about a website called wholesale girls, where you can find lots of headbands and other accessories  -- super cheap!  I was spending $4 for elastic headbands (to pin bows on) that they sell on their site for $.79 or less!  But it looks like we're headed out of the headband stage . . . Yay for hair!

3.4.12

Choose the Right

We've been talking lots and lots about choosing the right with our kids. The other day, while perusing pinterest (love me some pinterest!), I found a tut for changing the background color on CTR rings. I'm pretty excited about it! We're going to put them in the kids Easter baskets. I wanted to link to the tutorial. I searched pinterest for a pin that actually links to the sight where they got it, and none can be found. Sorry, but thank you, who ever you are!

I started with the normal green CTR rings I picked up at Deseret Book for $1/ea.
Then after some mishaps caused by guessing on the process, I dropped the rings in a cup of nail polish remover for 10 minutes. I put the first one in for a little less than that, but I found that the ring left in 10 minutes cleaned up much more easily. I used a toothpick and my fingernail to clean out the hard to get to places.
Then I made sure to rinse in warm water so the remover was completely gone before I started to add the nail polish. I found some pretty blue and pink nail polishes for $1/ea. It takes very very little nail polish.

I added the nail polish, even covering the letters. Then I cleaned the edges of the shield with a q-tip dipped in nail polish remover. To clean the letters, I found it best to lay the q-tip flat on its side and sweep it down the top of the ring. That way it only takes the polish off the letters.
Even though they love the green background, Jack and Addie are going to be so excited to have CTR rings that are their favorite colors!

10.12.11

Crystal Snowflakes

My kids thought these were the prettiest snowflakes they've ever seen!

Supplies:
Pipe cleaners
pencils
string
boiling water
Borax (found in the laundry aisle at the supermarket)
wide mouth container
First you take the pipe cleaner and cut it into 3 equal pieces. Then twist them together and spread the ends out to make your desired snowflake shape. We decided also to make a J and A for the kiddies.

Then attach a piece of string (I wouldn't recommend using twine like I did. It was too stiff and kind of made the snowflakes flip into each other) to one end of the snowflake and tie the other end of the string around a pencil (or other object that you can set across the top of the container so that the snowflake dangles).

Now, set the snowflake aside. Fill the container with boiling water (keep track of how much you add). For every cup of water you want to add 3 tablespoons of Borax. Stir to dissolve the borax. If some of it just won't dissolve, that's okay...it will still work.
Dangle your snowflake into the water and let it sit. I've heard you should wait over night, but I never really understood what that means. If I put it in at 1am and let it sit until I get up at 7am, is that long enough? Anyway, I put mine in the water at 10:30pm and at 7:30am they were done!

Its best to use one container per snowflake, but I could only find one so I put all three in at the same time. You don't want your snowflakes to touch each other or they'll get stuck together.

When we took them out to let them dry Addie was so excited to EAT hers! I guess will have to give rock candy a try some time soon! (ps. I did not let her taste it!!)

These little beauties are going make it onto the kids Christmas tree in their room. I wanted to hang them in a window so we could watch them sparkle, but I lost the vote!

15.8.11

What a *SUPER* Day!

Carrie made our nephews super capes for Christmas a couple years ago and they've been a big hit. Jack dons his daily, so I decided little miss Addie needed to be able to be 'super' too. I asked what colors she wanted but all she would say was pink. So one side of the cape is pink, and the other is patterned after Tinkerbell colors (her yellow hair, green dress, and white puff on her shoes).
I just made up a shape and cut out identical pieces from each color (I just used some cheap broadcloth). Then I sewed a super symbol (made out of felt) to each.

Then, with right sides facing, I sewed them together (leaving an open space for turning). I flipped it right side out and stitched around the edge again to make it look finished. I added Velcro to the neck and it called it done!

The kids had a blast! There's no time for a posed shot when there are so many 'super' things that need to be done!

4.7.11

Happy Fourth!!

The Fourth of July Weekend has been lots of fun! The boys went to see some big hot air balloons with their daddy on Saturday, we all went to a parade this morning, and had a barbecue afterwards, with some friends and family.

Photobucket

{tutorial for paper pinwheel cupcake toppers, from The Long Thread}

Photobucket

{tutorial for dot banner, from Talkin' Chow, Playin' House}

Photobucket


PROUD to be an AMERICAN!

10.2.11

Painted glass

I posted this idea for Valentine's Day, but decided I'd like to create something I'd use more often, so I went to Michael's for some 'Vitrea 160' (a water-based, transparent paint for glass) in turquoise and amaranthine (#s 11 and 7, respectively).

You want 160 because it remains transparent after baking. I also bought some paint thinner.


Then I stopped by the thrift store for some candlesticks and mason jars.


I poured a tiny amount of paint, along with about two drops of thinner, in a small tupperware bowl, stirred it around, and painted it on carefully with a paintbrush (with some assistance from my 'helper').


Then I baked it in the oven for the specified amount of time. I think it was 250 degrees for 25 minutes or something close to.

I haven't yet decided what to do with the candlesticks, although I LOVE how they turned out.


But my mason jars are being used to add some life to my previously colorless kitchen. The different shades were achieved by using different paint thickness. I used the least amount of thinner for the darkest one, more thinner for the one on the left, and the one on the right was created when I painted the Vitrea 160 on and then wiped it off with a paper towel. The words are now highlighted with blue but the majority of the jar is clear.


2.2.11

Once Wed: Fabric Pom Pom Tutorial

I started a monthly craft night with a group of friends and did a little searching for some projects. In the process, I found these cute fabric pom poms at Once Wed.

hanging-pom-pom2

I love how they turned out, but it took me awhile to get the process down so I thought I'd do my own tutorial.

Gather your supplies:
  • paper lantern (I got three in a box in the wedding section at Wal-Mart, for $10)
  • fabric (I got 2 yards. I'm sure you could get by with 1 3/4yd)
  • pencil
  • fabric scissors
  • glue gun
  • glue sticks
  • hard surface for tracing (I used a quilting mat)
  • circle for tracing (I used masking tape)


Fold your fabric a few times and trace your circle onto your fabric.


Cut all of your circles out.

You definitely want to fold your fabric as many times as you can while still being able to cut through it easily with your scissors. You don't want to have to cut out 200 circles by hand!

I was able to fit 26 circles onto my fabric and there were 8 layers, so I only had to cut 26 circles to get 208 in all.


Now you want to make your petals

Fold a circle in half


glue a dot (or a line perpendicular to the crease) in the center of the crease


and fold again

Tip: I leave the glue gun at the crease and fold over the gun. Just makes it easier.

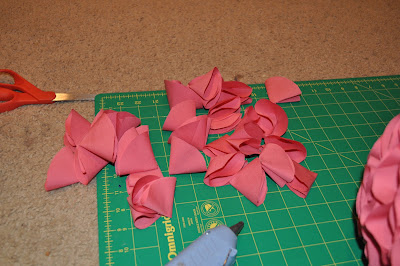
You have your first petal

Make the rest of your petals.

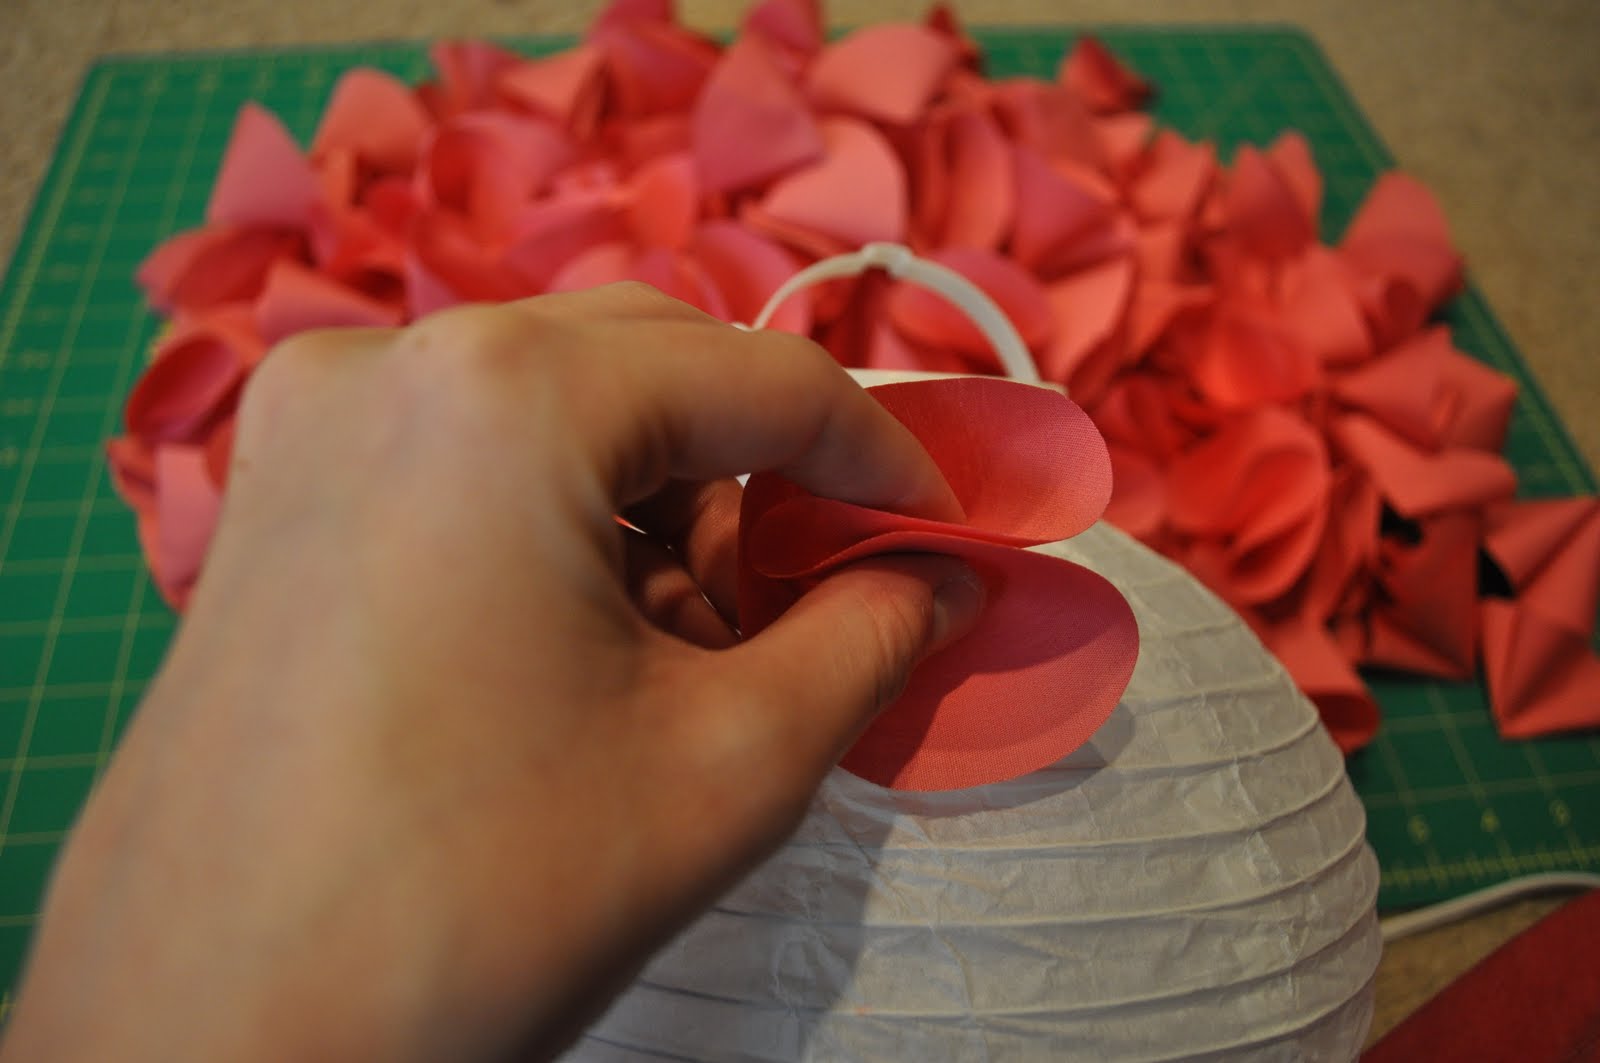
Grab your petal in the center, like this

Put some glue on the tip,

and place the point onto the uppermost part of the paper. Push down and hold for a few seconds, right at the base of your petal.


Keep attaching the petals around the top.


and continue on until you've gone about halfway down the lantern.

Turn it over and start at the top again.

Then keep filling it in until the top and bottom meet in the middle.

After filling the whole ball, I had some leftover petals. I used them to fill in any empty spaces.
note: I didn't use ALL of my circles. I had a pretty big stack that went unused (I'd say at least 4 of my stacks of 8). As long as you space your petals out pretty well, it's okay if every little bit of the lantern isn't covered.


so this is the end product(sorry for the changing colors. I worked on this throughout the day, so it was nighttime by the time I took pictures of the finished pom pom):

Photobucket

I replaced the tissue pom poms above the baby's crib, with this more durable fabric version.

Before:
Photobucket

After:

Photobucket

Since they light up, they work double duty as a night light!

Photobucket